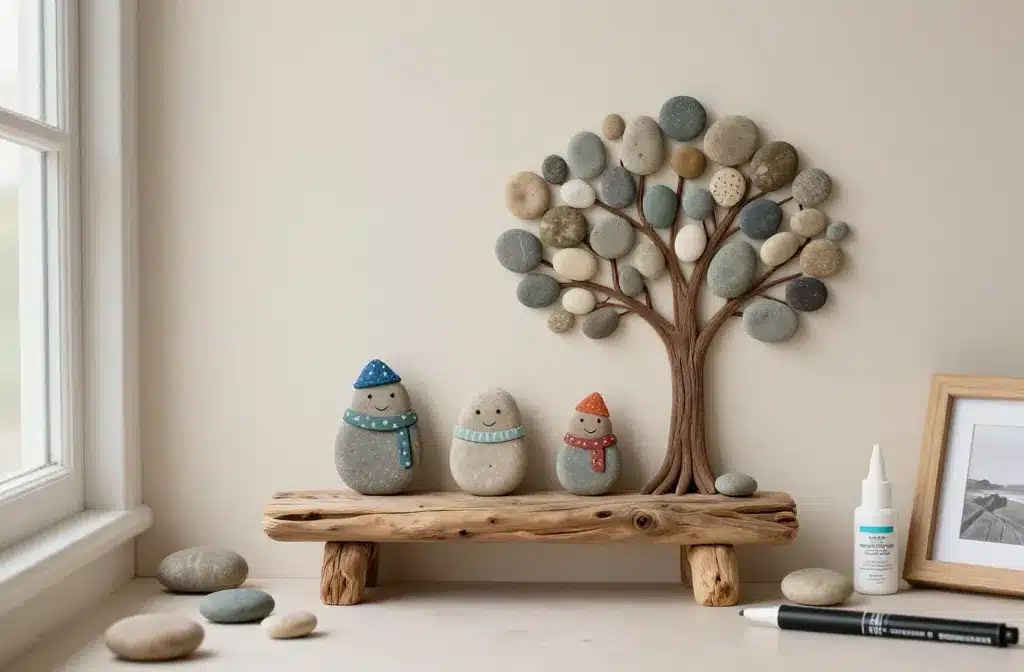
Pebble pictures turn humble beach finds into mini works of art. They feel earthy, sweet, and surprisingly classy—like nature’s version of a gallery wall. Ready to make something gift-worthy without a degree in fine arts? Grab some stones, a frame, and let’s turn pebbles into jaw-dropping decor.
1. Family Pebble Portraits With Personality
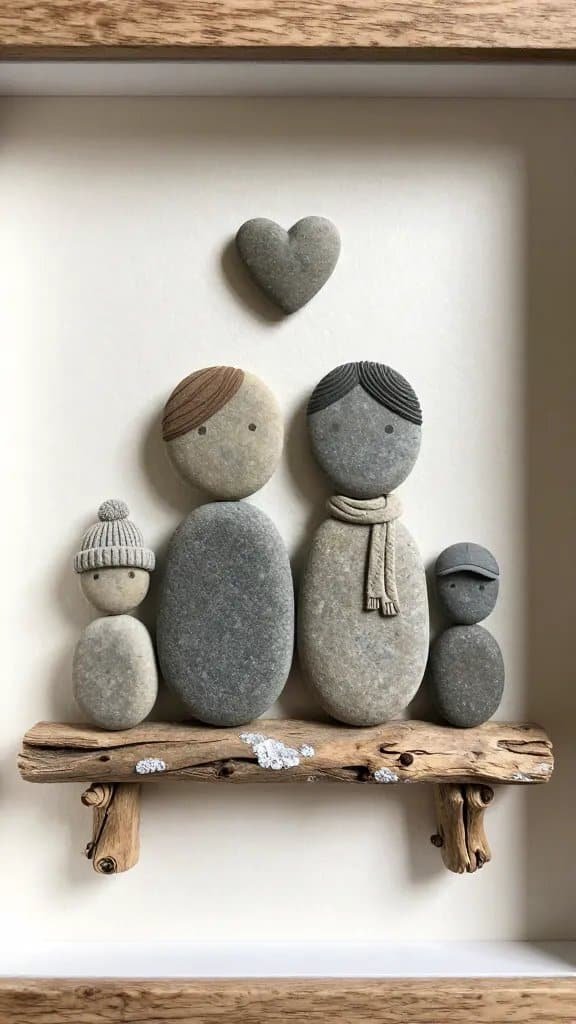
Nothing beats the charm of a pebble “family” lined up on a driftwood bench. Each stone becomes a person, and little details like hats or scarves turn it from cute to unforgettable.
Materials
- Flat oval pebbles in varying sizes
- Small twigs or driftwood for a bench
- Fine-tip paint pen for tiny details
- Shadow box frame
- Strong craft glue or epoxy
Arrange tallest “parents” in the middle and size down for “kids.” Add a tiny heart pebble overhead for instant warmth. This makes a perfect anniversary or housewarming gift—seriously, they’ll cry (happy tears).
2. Minimalist Pebble Tree On A Textured Background
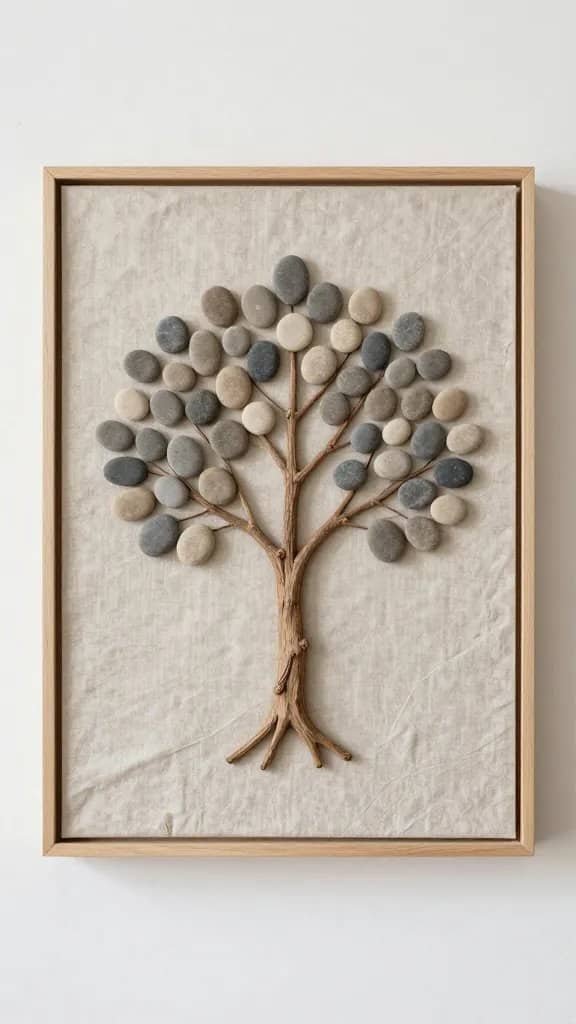
Want sleek and modern? A single branch “trunk” with pebble “leaves” nails that gallery aesthetic. Keep the background neutral so the stones pop.
Tips
- Use a slender branch for the trunk and main stem.
- Pick small, rounded pebbles in two coordinating tones.
- Mount on linen, canvas, or handmade paper for texture.
Cluster stones near the tips for a natural canopy shape. This suits hallways, entryways, or any spot that needs a calm, organic vibe.
3. Pebble Balloons With String Art
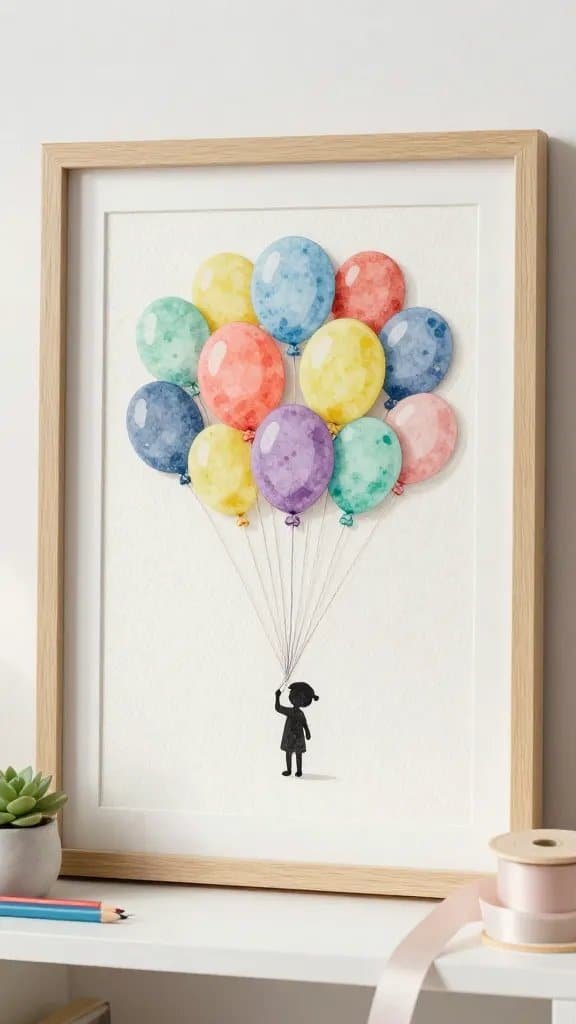
Whimsical and light, pebble “balloons” make a playful statement piece. Tie in real string or embroidery thread to add movement.
Key Points
- Select bright-toned pebbles or paint a few in candy colors.
- Glue pebbles in a loose bunch, then attach threads that meet at a tiny knot.
- Add a silhouette figure holding the strings using a simple line drawing.
Great for kids’ rooms or celebration gifts. It says “happy” without shouting.
4. Coastal Heart With Driftwood And Shell Accents
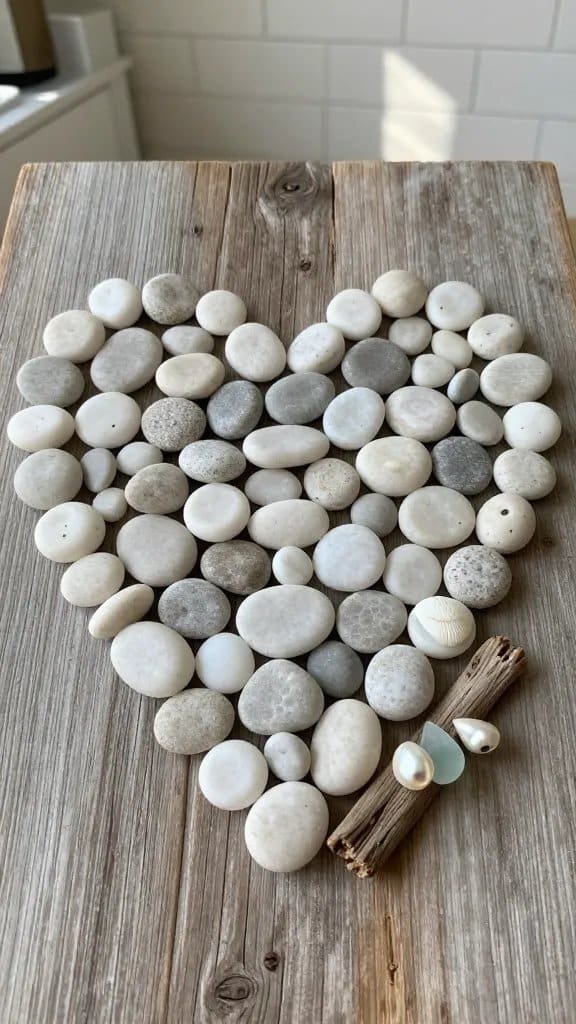
Lean into the beach-core look with a heart shape made from smooth white or gray stones. A few shells or sea glass bits give it subtle sparkle.
How-To
- Lightly sketch a heart on your backing board.
- Line the outline with smaller pebbles, then fill in with larger ones.
- Accent one side with a piece of driftwood or two shells for asymmetry.
Seal the piece with a matte clear spray if you’re using chalky stones. This design shines in bathrooms, coastal kitchens, and beach house entryways.
5. Mountain Silhouette Landscape At Golden Hour
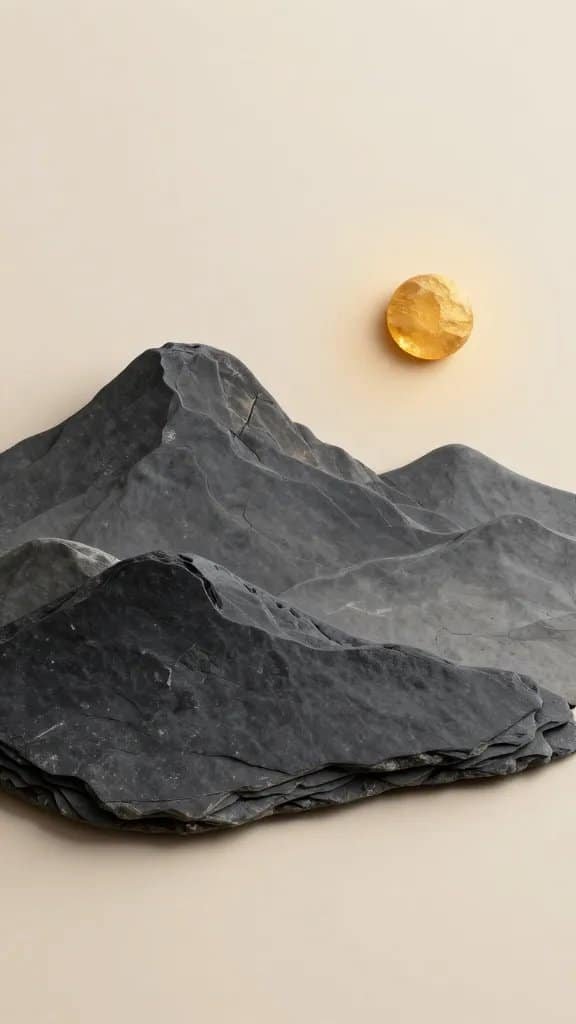
Stack flat, dark stones to form a layered mountain range. Add a single amber or warm-toned pebble “sun” for that end-of-day glow.
Materials
- Flatter slate-like pebbles for mountain layers
- One round golden-toned pebble (or painted stone) for the sun
- Muted background—think stormy blue or cream
Overlap the “mountains” to create depth, and keep the sky minimal. You’ll get high drama with barely any fuss—IMO the easiest “wow” piece for beginners.
6. Pebble Pets With Painted Ears And Tails
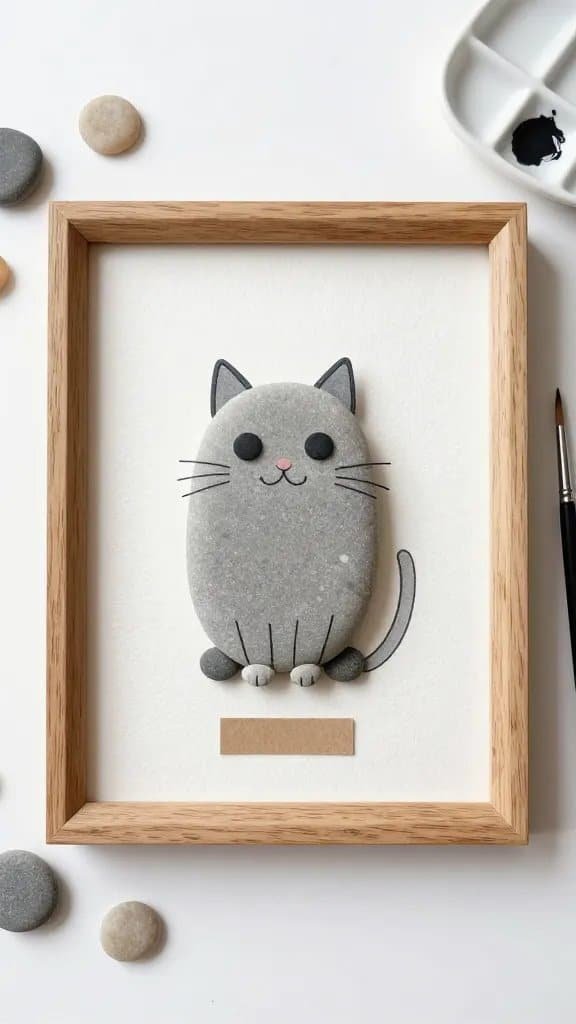
Pet portrait, but make it pebbles. Use one main stone for the body and add tiny pebbles for paws or a nose; finish with a few painted lines for ears and tails.
Tips
- Match pebble shape to your pet’s silhouette: oval for cats, rounder for dogs.
- Add micro-stones for eyes or use a fine-tip pen.
- Include a name tag label under the picture for extra charm.
Gift this to pet parents and you’ll be their favorite human. It’s sweet, modern, and not at all cheesy.
7. Botanical Pebble Stems In A Faux Herbarium
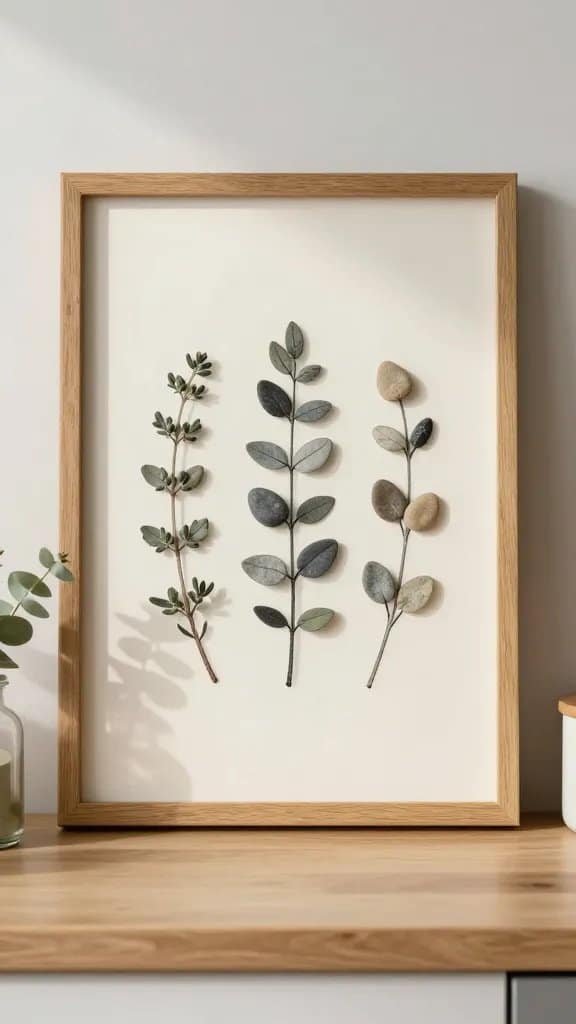
Think vintage botanical prints but tactile. Use pebbles as leaves and pair them with pressed stems or drawn ink lines for a delicate effect.
How-To
- Sketch simple stems with archival ink.
- Glue teardrop-shaped stones as leaves along each line.
- Label each “specimen” in cursive—Thyme, Olive, Eucalyptus—for an academic vibe.
Frame with a narrow black or oak frame. Perfect for kitchens, dining nooks, or any space that deserves a little “green” without watering.
8. Pebble City Skyline With Metallic Highlights
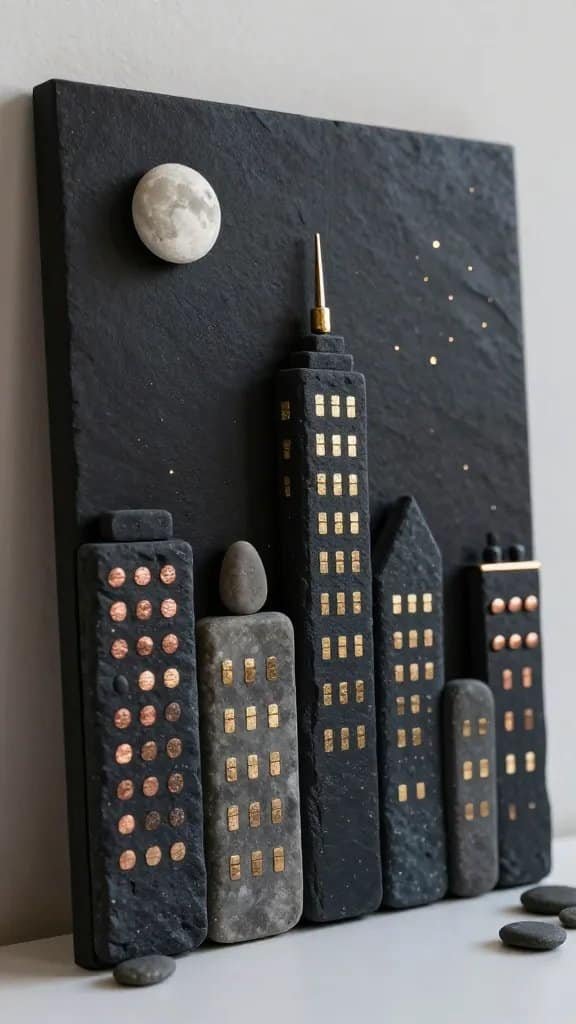
Make a nightscape that sparkles using pebbles as building blocks. Add metallic paint accents for windows and rooflines so it catches the light.
Materials
- Rectangular and square pebbles (or trimmed slate chips)
- Black or navy background
- Gold or copper paint pen for windows and stars
Stagger heights for a convincing skyline and tuck a moon pebble in the corner. This piece thrives in offices and reading nooks—urban, a little moody, and very cool.
9. Seasonal Pebble Wreath You Can Swap Year-Round
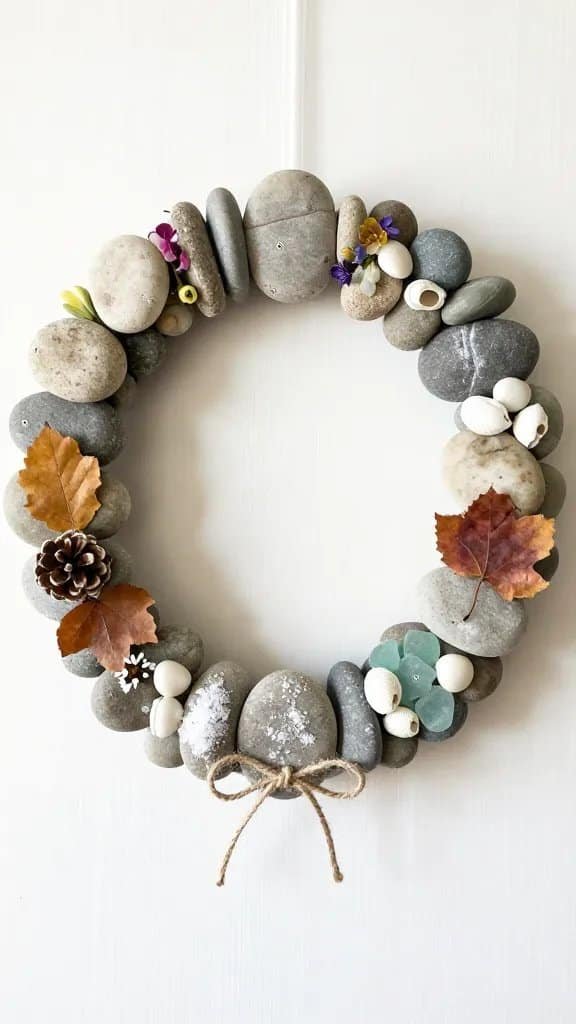
Create a circular wreath base from stones, then swap mini accents to match the season. You’ll use the same frame all year and update it in five minutes.
Modular Elements
- Base: round arrangement of neutral pebbles
- Spring: tiny silk blossoms or pressed flowers
- Summer: shells and sea glass
- Autumn: dried leaves or mini pinecones
- Winter: twine bow and a dusting of faux snow
Attach accents with removable adhesive dots. It’s budget-savvy and looks curated—FYI, guests will ask for the Etsy link you don’t have.
10. Storybook Scene: Pebble People On A Moonlit Hill
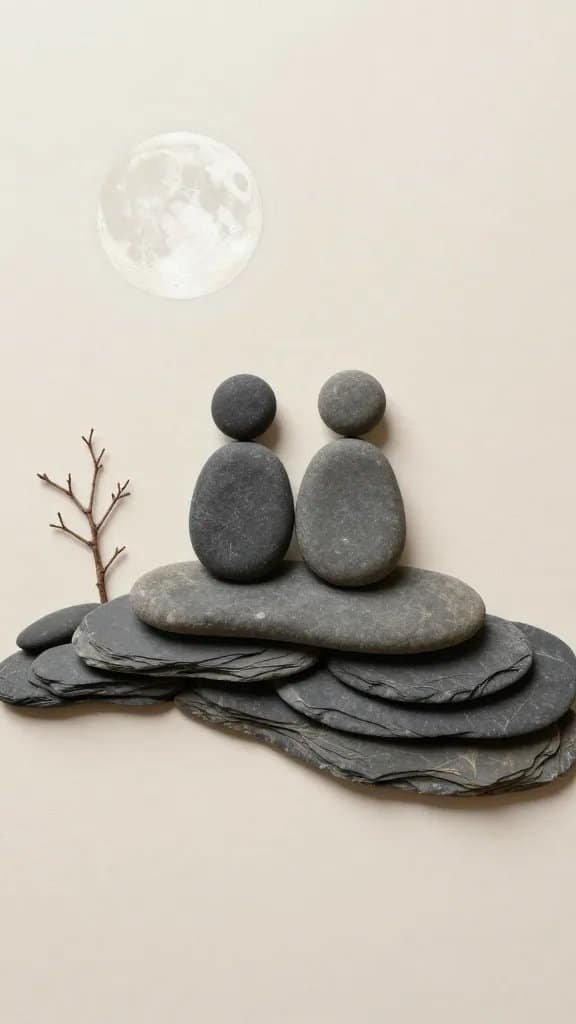
End on drama: two pebble figures sitting on a hill under a big moon. Include a line of poetry or a date and boom—instant heirloom.
Build The Scene
- Hill: layered darker stones with a gentle curve
- Figures: one medium pebble + one small pebble each (body and head)
- Moon: pale, round stone; add a soft halo with diluted paint
- Extras: a tiny twig tree or star speckles
Gift this for weddings, proposals, or anniversaries. It’s romantic without being corny—trust me, even minimalists will swoon.
Pro Tips For All Pebble Pictures
Want your pieces to last and look pro-level? A few small habits make a big difference.
Quality And Finish
- Clean pebbles with warm soapy water and let them fully dry.
- Use a strong adhesive like E6000 or a two-part epoxy for heavier stones.
- Choose a shadow box so pebbles don’t press against the glass.
- Seal porous stones with a matte spray if you want deeper color without shine.
- Compose before gluing—take a quick photo so you remember your layout.
These basics keep everything secure and gallery-ready. Display near natural light for maximum texture magic.
Finding And Selecting The Right Pebbles
Great pebble art starts with, well, great pebbles. Shape and color matter more than size.
What To Look For
- Flatter stones for layering and silhouettes
- Teardrop or oval shapes for leaves and bodies
- Round stones for heads, moons, and balloons
- Subtle color shifts—charcoal, taupe, cream, and soft pinks
Source from craft stores if your local beaches restrict collecting. Mix tones for depth, then stick to a tight palette to keep it cohesive.
Backing Boards And Frames That Elevate The Look
The right frame turns “cute DIY” into “did you buy that at a gallery?” Choose materials that complement your stones.
Best Pairings
- Linen or watercolor paper with pale stones
- Black matboard with metallic accents
- Natural oak frames for botanical and coastal themes
- Black metal frames for cityscapes and minimal pieces
Use a deep shadow box for dimension, and mount your backing on foam board to prevent warping. Clean edges = instant polish.
Small Details That Make Your Art Feel Custom
Personal touches elevate your art from pretty to priceless. Think inscriptions, tiny line art, or tactile add-ons.
Ideas
- Add a handwritten quote under the scene.
- Use micro pebbles for freckles, buttons, or flower centers.
- Layer thread, pressed botanicals, or a sliver of map paper.
- Sign and date the piece on the mat—artists do that for a reason.
These details tell a story. They also make your gift feel intentional and thoughtful.
Common Mistakes (And Easy Fixes)
We all glue first and regret later. Here’s how to dodge the usual oops moments.
Watch Out For
- Overcrowding: leave negative space so the design can breathe.
- Weak adhesive: if it peels, switch to epoxy and roughen the contact points.
- Heavy stones in shallow frames: choose a deeper box or lighter pebbles.
- Color chaos: stick to 2–3 main tones and one accent, max.
Fixes take minutes and save hours of rework. Your future self will thank you.
Gift-Worthy Packaging Ideas
You nailed the art—now nail the unboxing. Presentation makes your piece feel premium.
Simple Upgrades
- Wrap in kraft paper with twine and a dried sprig.
- Add a tiny care card with display tips.
- Include a note about where you sourced the stones—provenance = instant lore.
It feels boutique without the price tag. Your friends will think you moonlight as a designer.
Where To Display For Maximum Impact
Placement matters. You want light, contrast, and a little white space.
Best Spots
- Entryway gallery wall to set the tone
- Bathroom shelves for coastal pieces
- Kitchen nooks for botanicals and hearts
- Nursery corners for balloon scenes and pets
Group in odd numbers and vary sizes for a curated look. Instant upgrade to any boring wall.
Eco And Ethical Sourcing Notes
Collect responsibly. Some beaches and rivers protect their stones for erosion control.
Guidelines
- Check local rules before collecting.
- Take small amounts and leave unique or habitat-critical pieces.
- Buy from reputable suppliers when in doubt.
Doing right by nature makes the art even more meaningful. Win-win, right?
Quick Step-By-Step For Your First Pebble Picture
Overthinking it? Here’s a no-drama plan to get your first piece on the wall today.
Do This
- Pick a theme (family portrait or tree—easy wins).
- Lay out stones on your backing without glue and snap a photo.
- Glue largest stones first, then medium, then details.
- Let cure fully, then frame in a shadow box.
You’ll build confidence fast. Next thing you know, you’re making a whole series.
Cost-Saving And Upcycling Hacks
Art shouldn’t drain your wallet. You can create luxe looks on a shoestring.
Hacks
- Use thrifted frames and refresh with a quick sand and stain.
- Repurpose linen from old shirts as backing fabric.
- Trade pebbles with friends for better variety.
Save money, make art, feel smug. That’s the trifecta.
Finishing Touches To Make It Gallery-Ready
Little pro moves make your piece look store-bought. You’re basically curating now.
Final Polish
- Use spacers in your frame to keep stones off the glass.
- Wipe stray glue with a cotton swab and isopropyl before it cures.
- Add hanging hardware that matches the frame weight.
Now you’ve got art that holds up over time and compliments. Lots of compliments.
Display Themes You Can Mix And Match
Curate multiple pieces that talk to each other. Themed groupings make walls feel intentional.
Combos
- Coastal: heart, tree with driftwood, lighthouse silhouette
- Modern: skyline, minimalist tree, abstract stacks
- Whimsy: balloons, pets, storybook hill scene
Stick to one frame color per grouping. Cohesion = calm and classy.
Care And Cleaning (So Your Art Ages Gracefully)
Low maintenance, big payoff. Pebble art stays gorgeous with tiny bits of care.
Keep It Fresh
- Dust the frame and glass regularly with a microfiber cloth.
- Avoid direct sunlight if you used dyed stones or glued botanicals.
- Check adhesive points yearly and touch up as needed.
That’s it. Your future walls will thank you for the zero-drama upkeep.
Final Thoughts
Ready to turn a handful of stones into something people can’t stop staring at? Start simple, trust your eye, and let texture do the heavy lifting. You’ll end up with art that feels personal, earthy, and totally frame-worthy—no art school required.

Christian Grey is the creator of GemMeaning, where he shares simple insights about crystals, gemstone meanings, and spiritual guidance. His focus is on making complex ideas easy to understand and practical for everyday life.